
Navigating the LAX immigration process can be one of the most intimidating experiences for international travelers arriving in the United States for the first time. Los Angeles International Airport (LAX) is a sprawling beast of a hub, serving as the primary gateway to the West Coast for millions of visitors annually. Whether you are landing for a dream vacation in Hollywood or transiting to another state, understanding exactly what happens from the moment the airplane door opens until you exit the terminal is crucial for a stress-free arrival.
As a senior travel journalist who has passed through the Tom Bradley International Terminal (TBIT) countless times, I have witnessed the confusion, the long lines, and the relief of finally stepping out into the California sunshine. This guide is your roadmap to surviving US Customs and Border Protection (CBP) efficiently.
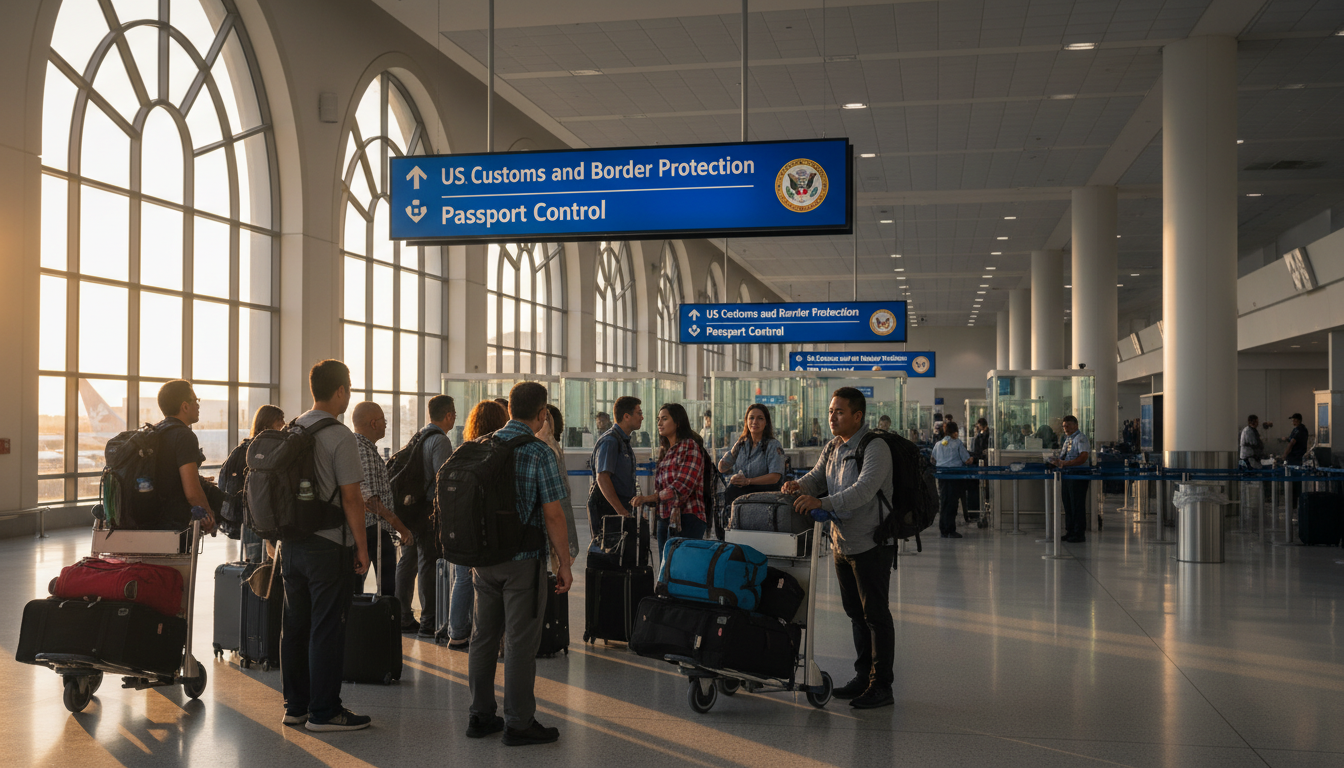
Step 1: The Long Walk to Passport Control
Once your flight lands, usually at the Tom Bradley International Terminal (though some international flights arrive at Terminals 2, 4, 7, or 6), you will be directed toward “Federal Inspection Services.” Do not expect to grab your bags immediately. At LAX, immigration always comes before baggage claim.
Prepare for a significant walk. LAX is massive, and depending on your gate, you may walk for 10 to 15 minutes through sterile corridors and escalators. Follow the signs for “Arrivals” and “Immigration/Customs.” Restrooms are available along the path—use them now, as the lines ahead can be unpredictable.
Step 2: Choosing the Right Line
Upon entering the massive immigration hall, you will see a sea of people and several distinct lanes. Choosing the correct lane is vital to speed up your LAX immigration process. The lanes are generally divided into:
- US Citizens and Permanent Residents: For passport holders and Green Card holders.
- Visitors / Non-US Citizens: The longest line, generally for B1/B2 visa holders and ESTA travelers.
- Global Entry / NEXUS / SENTRI: An expedited lane for pre-approved low-risk travelers.
- Mobile Passport Control (MPC): A hidden gem for eligible travelers (US citizens, Canadian B1/B2, and returning VWP travelers).
Step 3: The CBP Officer Interview
After navigating the queue or using an Automated Passport Control (APC) kiosk (if available and operational), you will eventually face a US Customs and Border Protection officer. This is the most nerve-wracking part for many, but for genuine travelers, it is straightforward.
Common Questions Asked at LAX Immigration
The officer’s job is to verify your identity and intent. Keep your answers short, truthful, and consistent with your visa application. Common questions include:
- “What is the purpose of your visit?” (Business or Tourism)
- “How long do you intend to stay?”
- “Where will you be staying?” (Have your hotel address ready)
- “Do you have a return ticket?”
- “How much cash are you carrying?” (Must be declared if over $10,000)
Once the officer stamps your passport (or processes you digitally, as stamps are being phased out in some lanes), you are officially admitted into the United States.
Step 4: Baggage Claim and Customs
Unlike many other countries, in the USA, you must pick up your luggage at your first point of entry, even if your bags are tagged to a final destination (e.g., Las Vegas or San Francisco). Proceed to the carousel, grab your bags, and head toward the Customs exit.
You may be stopped for a random baggage check. Officers might ask if you are bringing in food, plants, or soil. Be honest. Bringing undeclared fruit or meat can result in a $300+ fine on the spot.
Step 5: The “Re-Check” for Connecting Flights
If LAX is your final destination, you will exit into the Arrivals Hall. However, if you have a connecting flight, the process continues:
- Exit the Customs area with your bags.
- Look for the “Connecting Flights / Bag Drop” sign immediately outside the exit.
- Place your bags on the conveyor belt for your respective airline.
- You must then exit the secure area, walk to your connecting terminal, and go through TSA security screening again.
Because of this “double security” requirement, connection times at LAX should be a minimum of 3 hours. If you miss a flight due to immigration delays, having robust coverage is essential. We highly recommend looking into comprehensive options for travel insurance that covers missed connections and baggage delays.
Managing the Wait Times
Wait times at LAX are notorious. During peak hours (11:00 AM to 3:00 PM and 7:00 PM to 11:00 PM), the visitor line can take anywhere from 45 minutes to 2 hours. The hall is air-conditioned but often lacks seating. Ensure you have water and your documents organized in hand, not buried in your backpack.
Leaving the Airport
Once you survive the LAX immigration process, getting out of the airport is your next mission. The “LAX-it” lot is the designated area for Uber, Lyft, and Taxis. You will need to take a green shuttle bus from the arrivals level to the LAX-it lot. Alternatively, you can pay for a premium “Black Car” service which can pick you up curbside, or take the FlyAway bus to Union Station.
Final Thoughts on Arrival Anxiety
Traveling to the USA is an exciting adventure, but the bureaucracy of border control can be draining. The key is preparation. Have your documents ready, use the MPC app if possible, and remain polite with officers. However, if the stress of travel, long flights, and aggressive crowds leaves you feeling anxious or mentally exhausted, it is important to center yourself.
For those seeking spiritual grounding or methods to alleviate travel anxiety and find mental calmness after a chaotic journey, you might find helpful resources at Wazifa Hub.